Hola mis queridos amig@s, hoy les estare escribiendo mis notas para realizer el patron de simplicity New Look 6323. Es un look que se lleva bien a cualquier hora del dia y solo depende de los zapatos con que lo acompanes

.

Empecemos!

- Lo primero que vamos a hacer es sacar cada pieza del patron que necesitamos en la tela, en la foto de arriba podran ver que he puesto la pieza de la manga arriba de mi tela y la he marcado con mi marcador lavable para comenzar a cortar.
- mi tela es elastic y delgada, asi que ellas tienden a moverse un mas de las de algodon, por eso he usado alfileres para ayudarme a cortar las dos mangas aqui plasmadas.

- la primera recomendacion que les voy a hacer para cualquier Proyecto de tela elastic que tengan es la de escojer una aguja especial para su tela. En este caso necesitamos una aguja de jersey o de punta redonda. El trabajo de esta aguja es entrar entre las fibras de las telas elasticas sin romperlas.

- vamos a poner hombre con hombro juntos. como en la foto a mano derecha la de arriba.
- coselas con una puntada derecha de 3.0 mm. como ves a mano derecha la foto de abajo.
- por ultimo vamos a pegar con la misma puntada y el mismo largo de 3.0 mm un elastico transparente como el que usamos en los vestidos de bano; Para darle estabilidad a la costura y asi no permitir que el futuro esta se ensanche.

- ahora que ya la costura de los hombros esta hecha, yo te la maestro abierta en la foto de abajo a mano izquierda. Vamos a pasar a pegar nuestras mangas.
- en la foto de la derecha en la parte de abajo, les enseno la sisa del patron de enfrente, es muy facil identificarla porque en todos los patrones, esta tiene una pequena abertura en forma de V invertida como referencia.
- lo mismo encontramos en la foto de arriba, donde podemos ver dos aberturas, o cortes en forma de V V invertidas, esto nos hace referencia a que es la sisa de la parte posterior de la blusa.
- lo que que sucede con estas aberturas o V invertidas es que vamos a encontrarlas en la sisa de la blusa y en la manga, asi podremos poner nuestra manga sin equivocarnos de poner la manga parte posterior con la sisa de enfrente.

- vamos a juntar la sisa delantera con la parte de adelante de la manga, tambien la sisa posterior con la parte posterior de la manga y por ultimo vamos a ubicar el centro de la manga y lo uniremos con un alfiler a la linea del hombro.
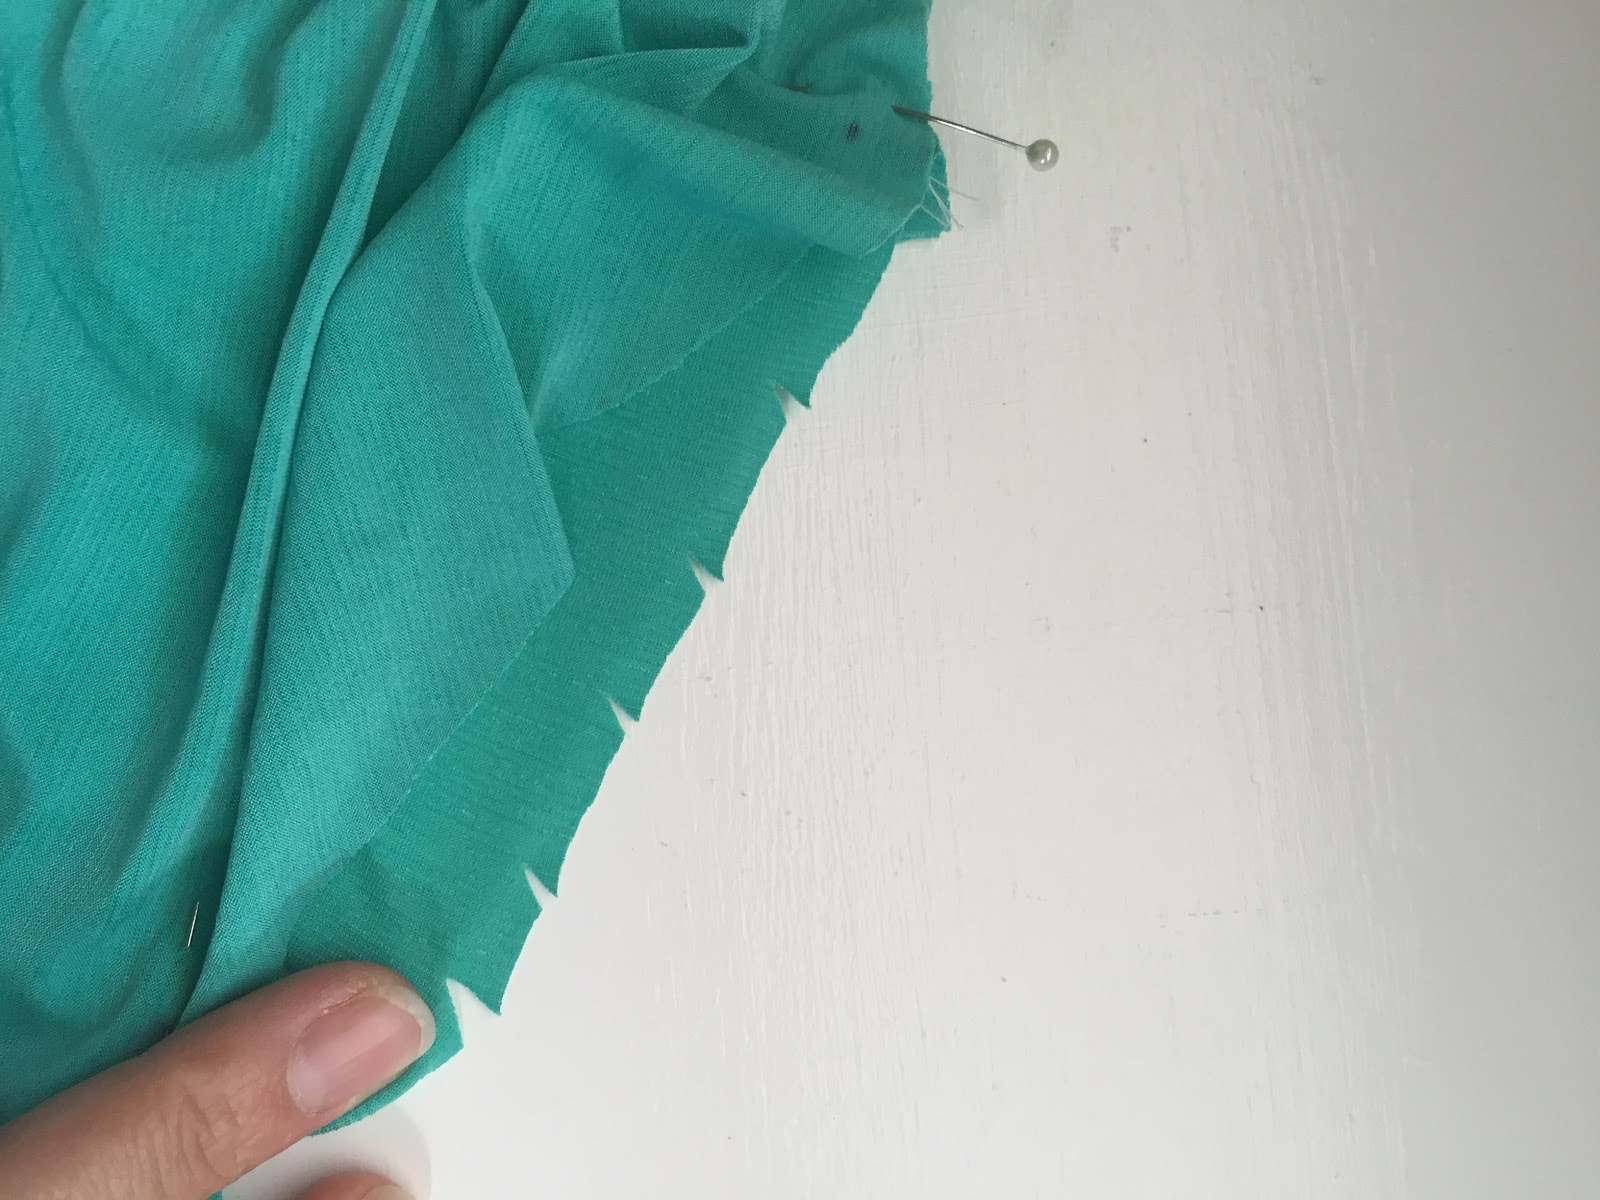
- luego de tener estos tres puntos ubicados vamos a hacer unos cortes diagonals en toda la sisa de la blusa ( ojo no en la manga) con estas cortaditas en diagonales vamos a lograr que la sisa logre una tension mas suave y alcance el mismo largo de la copa de la manga. Esto es lo que causa tener mas movimiento en el brazo.

- ahora pasemos a coser nuestra manga, en la foto de la izquierda estoy cosiendo mi manga a 1.5 cms del margen y en la maquina de coser con una puntada derecho a 3.0 mm de largo. Yo como tengo un poco de experiencia no uso alfileres.
- en la foto de la derecho estoy fileteando o terminando el margen de la tela.
- Lo importante es que al coser las mangas a toda camisa, se pone la manga arriba de la sisa, porque los dientesitos de la maquina ayudan a estirarla igualmente.
TIPS: las telas elasticas no se deshilan como las telas de algodon o todas en general, por eso hay personas que pueden hacer su ropa sin necesidad de una fileteadora.
si deseas hacer tus costuras como yo y no usar alfileres, solo tienes que poner tu mano con los dedos abiertos usandolos para abrir o crear tension en la tela elastic.

ahora que ya hemos pegado la copa de la manga a la sisa de la blusa, es hora de coser la manga por todo el largo, desde la boca de la manga pasamos por todo el largo hasta unir manga con manga y posterior de la blusa con la parte frontal de la blusa.
- en la foto de arriba a mano derecho, pueden ver la V invertida, eso como referencia de cerrar la manga y no dejar un lado mas largo que el otro. Asi podemos lograr una costura ideal como la que tengo en la foto de la izquierda.
- listo en la foto de de la derecha parte de abajo, ya tenemos casi lista la blusa. ahora solo falta terminar los falsos de la blusa, manga y el cuello.
COMO PEGAR UNA BANDA AL CUELLO DE LA BLUSA

Lo primero que debemos hacer es divider el cuello en cuatro partes iguales, (no, No!. las lineas del hombro no son parte iguales).
- Para divider el cuello en 4 partes iguales busca el centro posterior y el centro frontal o delantero de la blusa. como lo ves en la foto derecho parte de abajo.
- luego que tienes el centro posterior doblado y el centro delantero doblado, vuelves y doblas dejando el centro delantero con el centro posterior unidos, como en la foto de arriba hacia la izquierda y alli encontraras las otras dos partes que necesitabamos. Listo hemos encontrado los 4 puntos cardenales de la blusa.
- usted puede observer en la foto de arriba, hacia la derecha la foto de arriba, que tengo con pequenas lineas moradas, el centro posterior, el centro delantero, el Este y el Oeste de la blusa. Que Bueno que pueden ver que los hombros no son para partes iguales.

TIPS:
- la banda que vamos a pegar al cuello es al menos 20% menos larga que el cuello.
- Esta banda debe ser de tela elastica para poder estirarla.
- encontrar los 4 puntos cardinales de la banda asi como hicimos con el cuello de la blusa ( repita los pasos anteriores)

Tomando como referencia las 3 fotos de arriba continuaremos a pegar la banda al cuello.
- La banda la vamos a doblar para que quede como una cinta de bies, por ejemplo las fotos de arriba, mira la foto de mano izquierda la de abajo.
- con la banda ya doblada, unimos con alfileres los 4 puntos cardinales de la banda con los del cuello, asi como lo ven en la foto de arriba, la del top.
- Para coser, usa una puntada derecho de 3.0 mm de largo y comienza por uno de los puntos, trata de no coser sobre el alfiler. vas a ir estirando la banda a medida que se cose hasta que llegues al otro punto y continuas.

- cuando la banda ya esta pegada al cuello, es necesario terminarlo por afuera, dejando la costura de adentro hacia abajo y coser a 0.3 mm del cuello para que quede asegurada y la banda no se voltee. En la foto de arriba hacia la derecho pueden ver que estoy cosiendo muy cerca de la costura del cuello. Y asi como ven la foto de la izquierda les deberia quedar un cuello con banda muy bonito.
Ahora lo unico que debes hacer es terminar los falsos del vestido y de las mangas, si no lo quieres hacer pues no lo necesitas pero yo personalmente lo hago porque me gusta dejar un look muy professional.
Puedes encontrar este top en mis outfit de la semana, aqui mismo en el blog, Este es el fin de este tutorial, Espero que les guste y si quieres recibir articulos como este en tu correo electronico, No olvides suscribirte.
Dios les Bendiga!