STEPS
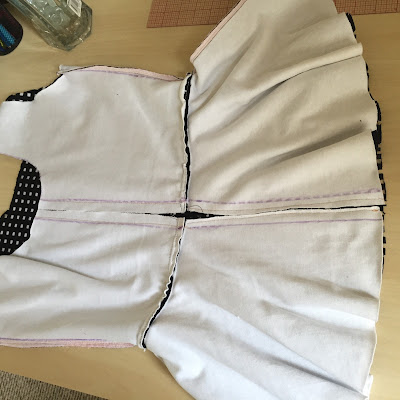
- I have decided to place like most people my zipper in the center back of my top, I have left two purple lines that I made with my washable marker, so you guys can see. Those lines are my seam allowance where i am going to place my zipper, they are 1/2" seam allowance.
- Now we are going to put the center back with center back right or self fabric together. So we can sew a long straight stitch of 4.5
- we need this length because we are going to remove this seam later.
- Now that we have that seam, we need to open it like I show you in the first picture above to the left, it will be ideal if you iron it, so you dont get gaps.
- place the zipper with the teeth down facing the fabric like a show you in the picture above at the bottom right, you need to place the teeth of the zipper in the middle of that seam.
- pin all your zipper in both sides so it doesnt move. dont worry we are almost done!
- Now that you have everything pinned, you need to turn around the garment and star sewing with a straight stitch of 3 or 3.5 on the side of the zipper. try not to cover the teeth of the zipper so it can slide down and up with not problem. like in the picture above left side, I show you my seams on each side of the center back.
- Now the last thing you need to do is to take of the long straight stitch we did on those purple lines and you are done!
This is my top with the centered zipper finished, you can barely know it is there. I only have to finished some little details in underarms and the neck line of my top and you will be able to see it in the outfits tab of my blog. this tutorial is ideal for beginners, go ahead do it afraid, we all have been there, I have my own story when I first started sewing but I will tell you about that in another moment.
Note: this top have been designed by Julie Harris.
I hope you guys find my tutorial interesting, if you like the blog subscribe with your email and don't miss any of my posts. God Bless you!


No comments:
Post a Comment