Recently I made a stripe black and white skirt that I am very sure everyone is going to like, but this year I decided to purge my wardrobe and I am doing that while sewing the new one. I know many of you wonder how exactly I am doing that?! well, I am going to get ready of clothes that I really don't wear and sew new clothes that match my style.
So for my skirt, I decided to make a black top with stripes sleeves, but not just that, I wanted to add some personality to my top and designed petal sleeves for it.
Here is a picture of the sleeve for those who don't have much idea; So pretty much is a normal sleeve that divides in two and overlaps.
First, I design my the sleeve.
- You can see in the attached picture a line in the middle of the sleeve that divides it, that is the line where usually I will put together the sleeve in the underarm.
- Since it looks like wings, let's say that the left wing is the part of the sleeve that goes to the back armhole of the shirt, I have written down the shoulder point that is the most prominent point of your shoulder and where the petal sleeve should overlap.
- you can also see the 2 notches indicating that is the back sleeve
- in the right wing you will see the correspondent notes for the front armhole, shoulder point and the one notch.
Now we have the sleeves out of the fabric; I decide to make my petal sleeves with a black linen like the skirt, and I put right side of the stripe fabric with the right side of the black sleeve.
I used to pins to hold together my fabric because sometimes fabric slips while sewing layers.
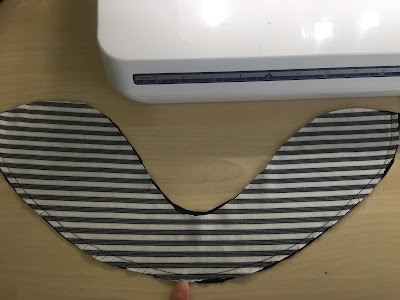
In the next picture, I have sew together both layers of fabric right sides together all the way through the bottom of the sleeve, only the bottom.
Note: if your petal sleeve is only one single layer of fabric, you only have to do the hem instead.
Make sure and cut to and not through from the edge of the fabric to the sewn stitch line.
Before having wrong sides of the sleeve together to attach it to the shirt, I did under stitch my sleeve. The purpose of under stitching my sleeve is so the fabric under won't try to curl up in the sleeve, so making the under stitch will keep the black fabric nit and stayed in place.
Under stitch steps:
- Open the sleeves linen away from self fabric.
- place the seam allowance toward the linen fabric, in this case the black fabric.
- start sewing in the seam allowance about an 1/8 from the stitch line, the picture above will give you an idea.
Now, I have my wrong sides together and I stitch again my two layers of the sleeve but this time at the top so they won't move when I will attach the sleeve to the shirt.
After the last step above, I just need to find the shoulder point notches in my sleeve, overlap the sleeve and sew together the 4 layers of fabric again so you can finally attached the sleeve.
There are my two sleeves left and right overlapped and ready to be attached to the shirt.
Now you will attach the sleeve as a very usual sleeve, just remember where is the shoulder point and where the front and back sleeve come together in the under arm.
Subscribe to my Blog and God Bless you all! Have a nice week.


No comments:
Post a Comment