the zipper in the pants

Hello my dear readers, today I decided to bring a tutorial about how to install a zipper in pants.  Pants are very easy to make but most people struggle sewing the zipper in place and I don't blame them, because without a good technique or the proper instructions, your pants can be ugly and with lack of style just because you can really see the zipper while you are wearing them.

This tutorial is not only for those of you that want to make new pants, but also for those who want to change the zipper in a pair of pants that has it broken.

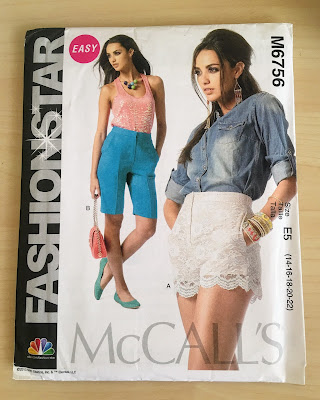
I decided to use this wonderful pattern from McCall 6756 and although, I love to make my own clothes under Julie Harris Creations brand and designs, most of my books and notebooks are in a storage room until our house in Georgia is built.
I am placing plenty of pictures in the blog for this tutorial, so you guys can have a better idea of this project.


In this picture we have the front of the pattern which indicates where i am going to place the zipper. it also shows 2 lines, the first line from right to left indicates the folding line for the left front pattern of the pant.  And the second line from right to left that says center front, will be the folding line for the the right front pattern of the pants.
I have sewn the fronts together from the square until the crotch line, sewing later the back legs to the front one and sewing together the back seam of the crotch.


Now, I have the pant right side front towards me and this is the way  I am going to be talking about the right side the one we see in front of us in the picture and the left in the same way.
the left side I am going to fold it towards the inside of the pants in the first line from the edge in.


Now that I have folded the left side in the first line, with pins I am placing the zipper to secure it.
the fold of the pant falls exactly before the teeth of the zipper.


Here I have the zipper opened to start sewing it in the sewing machine.


This can be something silly to mention for people with plenty of experience sewing, but now that I am sewing the zipper to the pant and I have come to the place where I find the head of the zipper, I stopped sewing, leaving the needle down, rise the foot of the sewing machine and close the zipper.  Then again, put the presser foot down and continue sewing all the way to the ending of the zipper.
Keep in mind that at the bottom of the zipper there is a metal square that keeps the zipper in place and you don't want to place your needle there because it will break the needle and the worst that can happen is to damage the tempo in the machine and you will need to send it to repair. So Avoid it!


Ready! I have the zipper attached to the left of the pant and now I will be working on the right side of the pants.


 Now different from the left side, I am going to fold the right side of the pant in the line 2.


 Now with the pants front to me, the left side has been fold in the line 1 and sewn to the zipper, and the right side is folded in the line 2 and I have it pinned.  this right side falls in the line 2 of the left side covering completely the zipper.


 This is the way it will look in the inside of the pants, compare to yours if you are following my steps.


 Now, the zipper is going to be sewn to the inside of the folded fabric, see the example of my picture where I have pinned leaving the front layer alone, having still the other pins on the line 2 of the left side of the pants to make sure that the layers don't move.
I proceed to sew the zipper to the fly of the pants.


Ready! here I have sewn the zipper to the right fly of the pants; and this is the final step of the McCalls pattern, which I think it needs the overlap to make my pants more stylish.


 This picture is a prove that we needed to sew the right side of the zipper only to the right fly of the pants without including the the front of the pants.


Now I open my zipper and I proceed to sew the pink line in the right side of my pants!


This is the overlap that my pattern didn't bring, but I made my own and i am about to sew it together.


I have the pants wrong side out towards me.


 Keeping this picture as an example, the very straight side of the overlap is going to be sewn in the right side that you see in the picture in front of you.


when you turn you pants right side of the fabric out, you will see the overlap attached.


Almost ready, so you never want to leave the overlap loose, so I sew the right low corner of the overlap in the curve of the right side of the pants (see the circle) while the zipper is closed.


This is a draft that I made with some fabric that my Brazilian friend gave me, in this picture I have reduce the crotch length, the hips, the inside of the legs and the outside as well. I have worked in the fitting issue of the curve of the crotch and this is my result.


This is the End, I hope is a helpful information for whoever need it and if you like my blog don't forget to subscribe to it and follow me in the social media.
God Bless You all xxoo!

La corredera de un pantalon

Hola mis estimados lectores, en este dia quize preparar un tutorial de como poner la corredera de un pantalon.  si la tecnica empleada no es la mas eficiente, muy probablemente podras ver los dientes de la corredera cuando cuando te pongas el pantalon.  
Ahora, este tutorial no es solo para aquellos que quieran hacer un pantalon, sino tambien para aquellos que hace mucho no se ponen un pantalon debido a que la corredera esta dañada.

Yo he usado este maravilloso patron de McCall 6756 que hace mucho tiempo lo tengo en mi stash de patrones y la verdad yo prefiero diseñar mis propios patrones pero lamentablemente todas mis notas y libros estan en un lugar de almacenamiento hasta que finalmente terminen la construccion de mi nueva casa, asi que decidi trabajar con este patron que es una maravilla.

Hacer un pantalon o shorts es muy facil, pero la razon por la que no todo el mundo realiza un buen pantalon es porque para ello se necesitan buenas tecnicas de ajustes. 

en este tutorial trate de hacerlo lo mas explicito posible y por eso tengo tantas fotos como sean posibles para aquellos que deseen hacerlo paso a paso conmigo.


En esta primera foto tenemos la parte del pantalon delantera, pueden ver el tiro es mas corto y la pestana amplia y ovalada donde se pondra la corredera.
presente hay dos lineas, la primera de afuera hacia adentro indica la linea de doblaje para el lado izquierdo, y la segunda linea recta es la linea de doblaje para el lado derecho.  ( mas adelante lo veremos con mas detalle)
se debe coser el pantalon desde la parte del tiro, dejando libre la pestaña de la corredera, coser las patas del pantalon y unir los patrones traseros.


Ahora para que sea mucho mas facil de identificar, aqui tenemos el pantalon de frente a mi con el lado correcto hacia afuera y toda las costuras estan hacia adentro.  Tambien identifiquemos el lado izquierdo de frente a nosotros donde se va a doblar la primera linea hacia adentro.

detalladamente se pueden observar dos puntos rosa o fucsia denotando las lineas; se doblara la linea 1era desde afuera de la pestaña del pantalon.


fijese que se doblo la primera linea hacia adentro, con alfileres de tu gusto vamos a asegurar la corredera a la tela para luego coserlo.   Mi tela la tengo doblada y el filo del doblez  esta justo antes de los dientes de la corredera.


Aqui estoy abriendo la corredera para empezar a coser la corredera a la pestaña del pantalon.


Esto es algo que para muchos es tonto pero igual yo quiero escribirlo, ahora que voy a coser donde esta la cabecita de la corredera, simplemente me detengo, con la aguja abajo, alzo el pie de la maquina y subo la corredera, entonces continuo cosiendo la cremallera o corredera teniendo en cuenta que al llegar hacia abajo completamente no meter la aguja en la parte metalica que detiene la corredera.  si esto ocurre lo mas probable es que se parta la aguja y algunas maquinas pueden sufrir un pequeño daño mayor desestabilizando el tiempo de la maquina y necesitara reparaciones.


Listo la corredera esta pegada del lado izquierdo de frente a nosotros! y aqui pueden observar que tan cerca ha quedado el doblez de la tela con los dientes de la corredera o cremallera.


 Ahora es hora de trabajar en el lado derecho del pantalon para terminar de pegar la corredera.  Igualmente que como en el lado derecho yo marque las dos lineas ( 1 y 2 ).  La linea 1 fue la que usamos en el lado izquierdo del pantalon anteriormente y ahora usaremos la linea 2.

es hora de doblar este lado por la linea central 2 hacia adentro.


 fijese que aqui esta doblado el lado derecho hacia adentro y lo tengo alfilereado.  El doblez del lado derecho cae en la linea 2 del lado izquierdo donde ya he pegado la corredera anteriormente.


 Aca he volteado al reves el pantalon aun con alfileres, solo por demostracion para los que lo hagan en sus casas.


 Ahora es imprecindible de poner alfileres en la pestaña que esta doblada hacia adentro con la corredera, dejando libre el frente del lado derecho como  les enseño a continuacion y procedo a pegar la corredera a maquina.


Listo! ya he pegado la parte derecha del pantalon con la corredera, aqui esta al reves.


 Como habia dicho que la parte derecha solo se iba a pegar la pestaña dejando el frente libre como se puede ver aqui.


Abro la corredera, doblo mi pestaña del lado derecho nuevamente  por la linea 2 y la aseguro con los alfileres  para asegurarla con la maquina finalmente.  Ahora a coser por toda la linea rosada dejando la pestaña asegurada y el pantalon con estilo.


Esta es la solapa que he creado y esta hecha al doblez! esta solapa va a tapar la corredera en la parte de adentro para que esta no quede vulnerable o desnuda al ojo.  este patron de McCall por algun motivo no trajo una pero todos los pantalones la traen.


Ahora para pegar la solapa, tenemos de nuevo el pantalon al reves y de frente a nosotros.


 La parte recta de la solapa se pegara al lado izquierdo del pantalon, pero como aqui esta al reves usen esta imagen como ejemplo y peguen la parte recta de la solapa con la parte del pantalon que tienen a la derecha frente a ustedes y al reves.


Al voltearlo al  lado derecho, debe haber quedado asi!


Ahora para terminar con el proceso de pegar una corredera o cremallera, solo es question de pegar la punta de abajo semi circular de la solapa con la punta de abajo de la pestaña derecha que esta adentro.


Aqui esta mi primer borrador que hice, la tela fue un regalo de una amiga de brazil y a este borrador ya  le habia reducido el tiro, las patas y caderas las habia reducido igualmente para que el pantalon tuviera un estilo delgado o slim.  Siempre trato en lo posible antes de trabajar en una tela costosa de hacer un borrador donde se pueda practicar y corregir hasta llegar al punto donde se quiera llegar.


Esto ha sido todo, si te gusto no te olvides de suscribirte a mi blog donde te llegara a tu email automaticamente cuando yo haga un post o seguirme en las redes sociales.
Un beso a todos y Dios los Bendiga!

Black and White petal Outfit

Petal sleeve shirt and stripe skirt


I worked so hard designing this skirt, the petal sleeves and the shirt.  The whole outfit is Me Made By Julie Harris Creations, it is enough with the hard work that I did on my moulage at the beginning of my pattern making classes with the teacher Suzzy Furrer, so after those classes and my dedication I can create whatever outfit that come to my mind.

The skirt and the shirt are both made with Jersey Knit from the store www.fabric.com  these fabrics were a gift from my husband from the last valentine day  that we celebrated; because of my health issues and latest relocation to Georgia, Just now I get to enjoy them.

what do you think of my designs?! don't forget to comment and subscribe to my blog. 

God Bless You!


Blusa Petalo con falda a rayas


Les quiero hablar de lo mucho que disfrute haciendo este outfit de blusa petalo y falda de rayas blanca y negro.  Ambos la blusa y la falda fueron enteramente disenados por mi Juile Harris Creations, solo fue suficiente con el arduo trabajo del moulage que prepare durante las clases de patronaje con la profesora Suzzy Furrer para poder de este hacer cualquier diseno que se cruze por mi mente!

El outfit completo fue hecho con las telas elasticas Jersey de la tieda online www.fabric.com ambas fueron un regalo de mi esposo en el ultimo dia de valentin que celebramos juntos y justo ahora tuve la oportunidad de disfrutarla debido a los pequenos problemas de salud que me toman tiempo y la ultima mudanza familiar al estado de Georgia. 

Que te parecieron mis disenos?!  No olvides comentar y suscribirte a mi Blog.

Dios los Bendiga! 


Swimsuit Vogue Pattern 9192

  Sew with my this cute swimsuit piece and enjoy some of the tips I provide to have an amazing final product.    In this video I will show y...