Hello my dear readers, today I decided to bring a tutorial about how to install a zipper in pants. Pants are very easy to make but most people struggle sewing the zipper in place and I don't blame them, because without a good technique or the proper instructions, your pants can be ugly and with lack of style just because you can really see the zipper while you are wearing them.
This tutorial is not only for those of you that want to make new pants, but also for those who want to change the zipper in a pair of pants that has it broken.
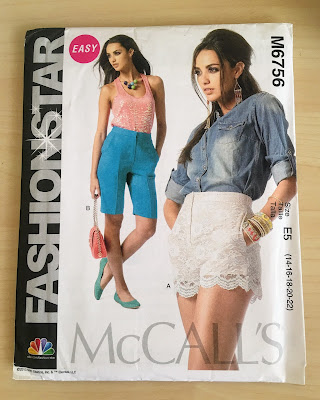
I decided to use this wonderful pattern from McCall 6756 and although, I love to make my own clothes under Julie Harris Creations brand and designs, most of my books and notebooks are in a storage room until our house in Georgia is built.
I am placing plenty of pictures in the blog for this tutorial, so you guys can have a better idea of this project.
In this picture we have the front of the pattern which indicates where i am going to place the zipper. it also shows 2 lines, the first line from right to left indicates the folding line for the left front pattern of the pant. And the second line from right to left that says center front, will be the folding line for the the right front pattern of the pants.
I have sewn the fronts together from the square until the crotch line, sewing later the back legs to the front one and sewing together the back seam of the crotch.
the left side I am going to fold it towards the inside of the pants in the first line from the edge in.
Now that I have folded the left side in the first line, with pins I am placing the zipper to secure it.
the fold of the pant falls exactly before the teeth of the zipper.
Here I have the zipper opened to start sewing it in the sewing machine.
This can be something silly to mention for people with plenty of experience sewing, but now that I am sewing the zipper to the pant and I have come to the place where I find the head of the zipper, I stopped sewing, leaving the needle down, rise the foot of the sewing machine and close the zipper. Then again, put the presser foot down and continue sewing all the way to the ending of the zipper.
Keep in mind that at the bottom of the zipper there is a metal square that keeps the zipper in place and you don't want to place your needle there because it will break the needle and the worst that can happen is to damage the tempo in the machine and you will need to send it to repair. So Avoid it!
Ready! I have the zipper attached to the left of the pant and now I will be working on the right side of the pants.
I proceed to sew the zipper to the fly of the pants.
Ready! here I have sewn the zipper to the right fly of the pants; and this is the final step of the McCalls pattern, which I think it needs the overlap to make my pants more stylish.
Now I open my zipper and I proceed to sew the pink line in the right side of my pants!
This is the overlap that my pattern didn't bring, but I made my own and i am about to sew it together.
I have the pants wrong side out towards me.
when you turn you pants right side of the fabric out, you will see the overlap attached.
Almost ready, so you never want to leave the overlap loose, so I sew the right low corner of the overlap in the curve of the right side of the pants (see the circle) while the zipper is closed.
This is a draft that I made with some fabric that my Brazilian friend gave me, in this picture I have reduce the crotch length, the hips, the inside of the legs and the outside as well. I have worked in the fitting issue of the curve of the crotch and this is my result.
God Bless You all xxoo!


No comments:
Post a Comment